Getting Started with LoyaltyTree
Complete setup guide to launch your eco-friendly loyalty program in under 30 minutes. Learn how to enable app embeds, configure checkout extensions, and test yo
🚀 Getting Started with LoyaltyTree
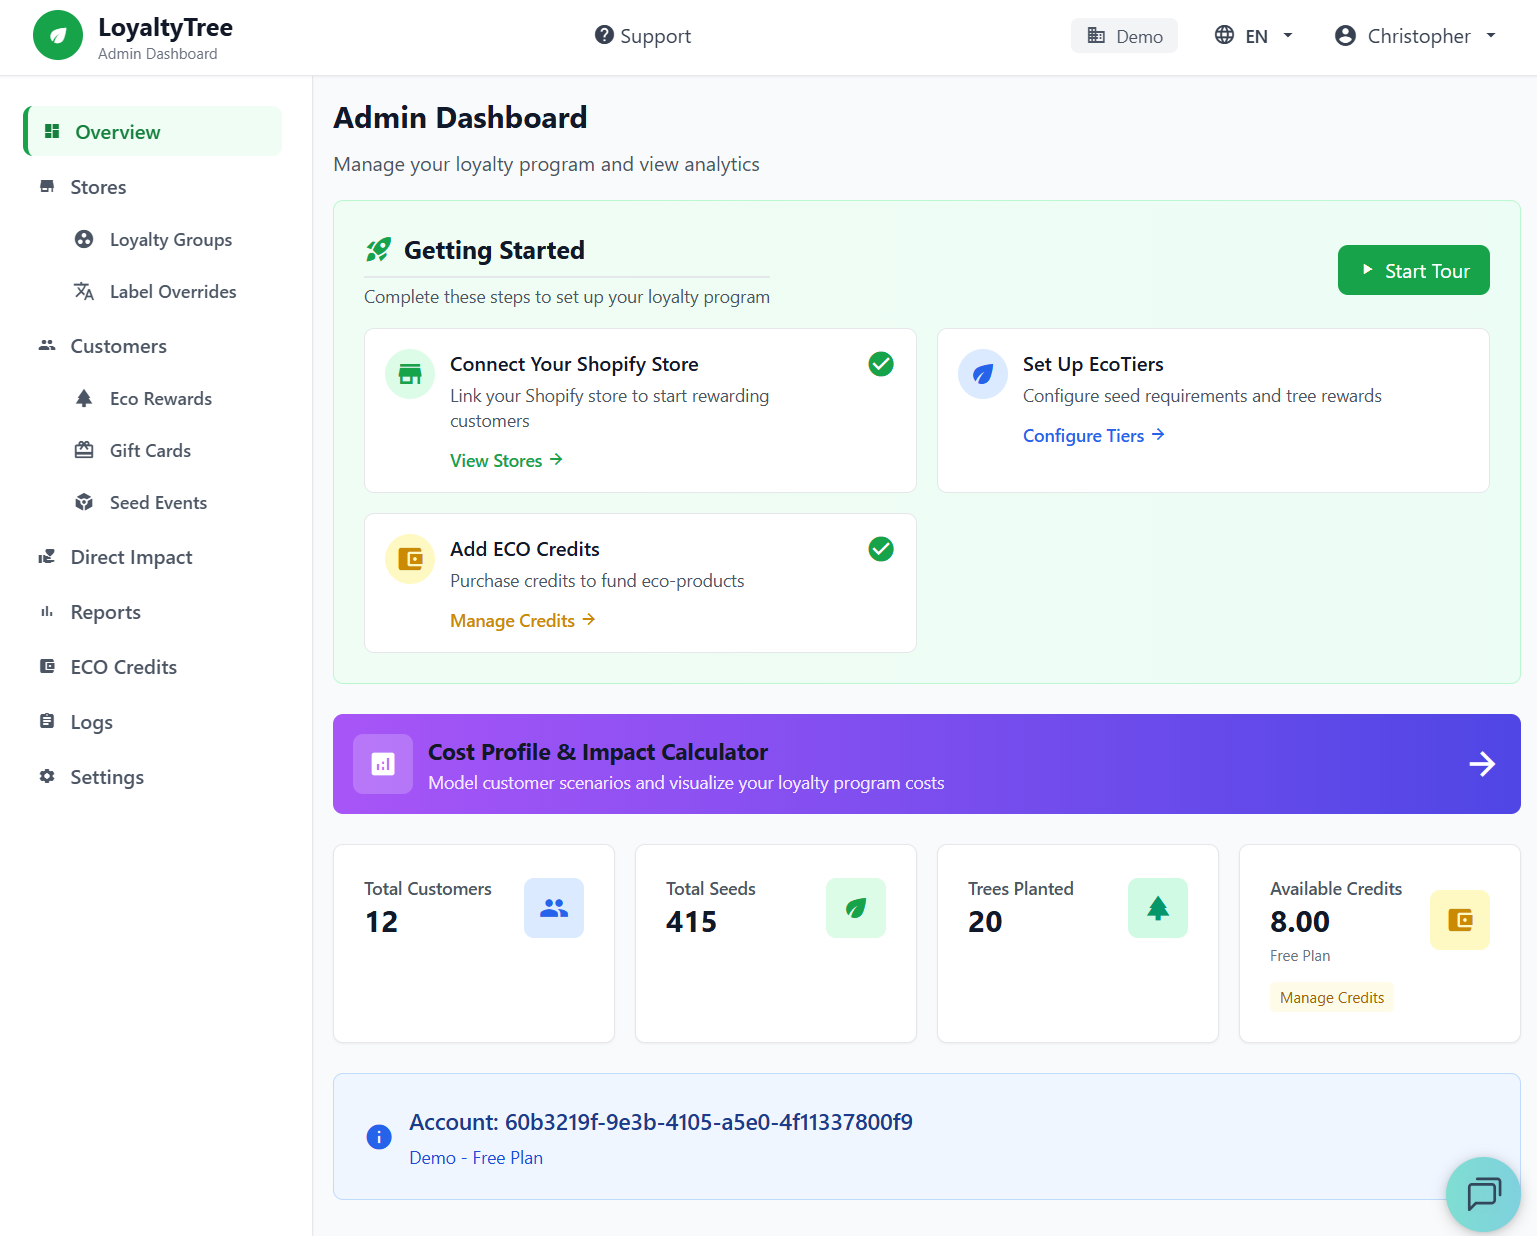
Your admin dashboard provides a complete overview of your loyalty program performance
Complete setup guide to launch your eco-friendly loyalty program in under 30 minutes
Quick Setup Steps
Step 1: Create Your LoyaltyTree Account In Shopif
Just install the APP in your store and an account will be automatically created for you to manage. Click the LoyaltyTree.eco apps link in Shopify Admin to access your dashboard.
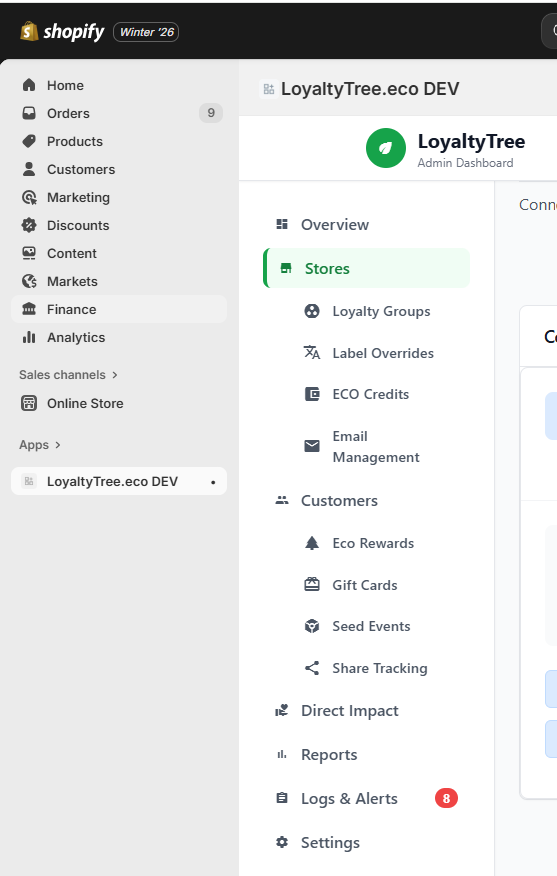
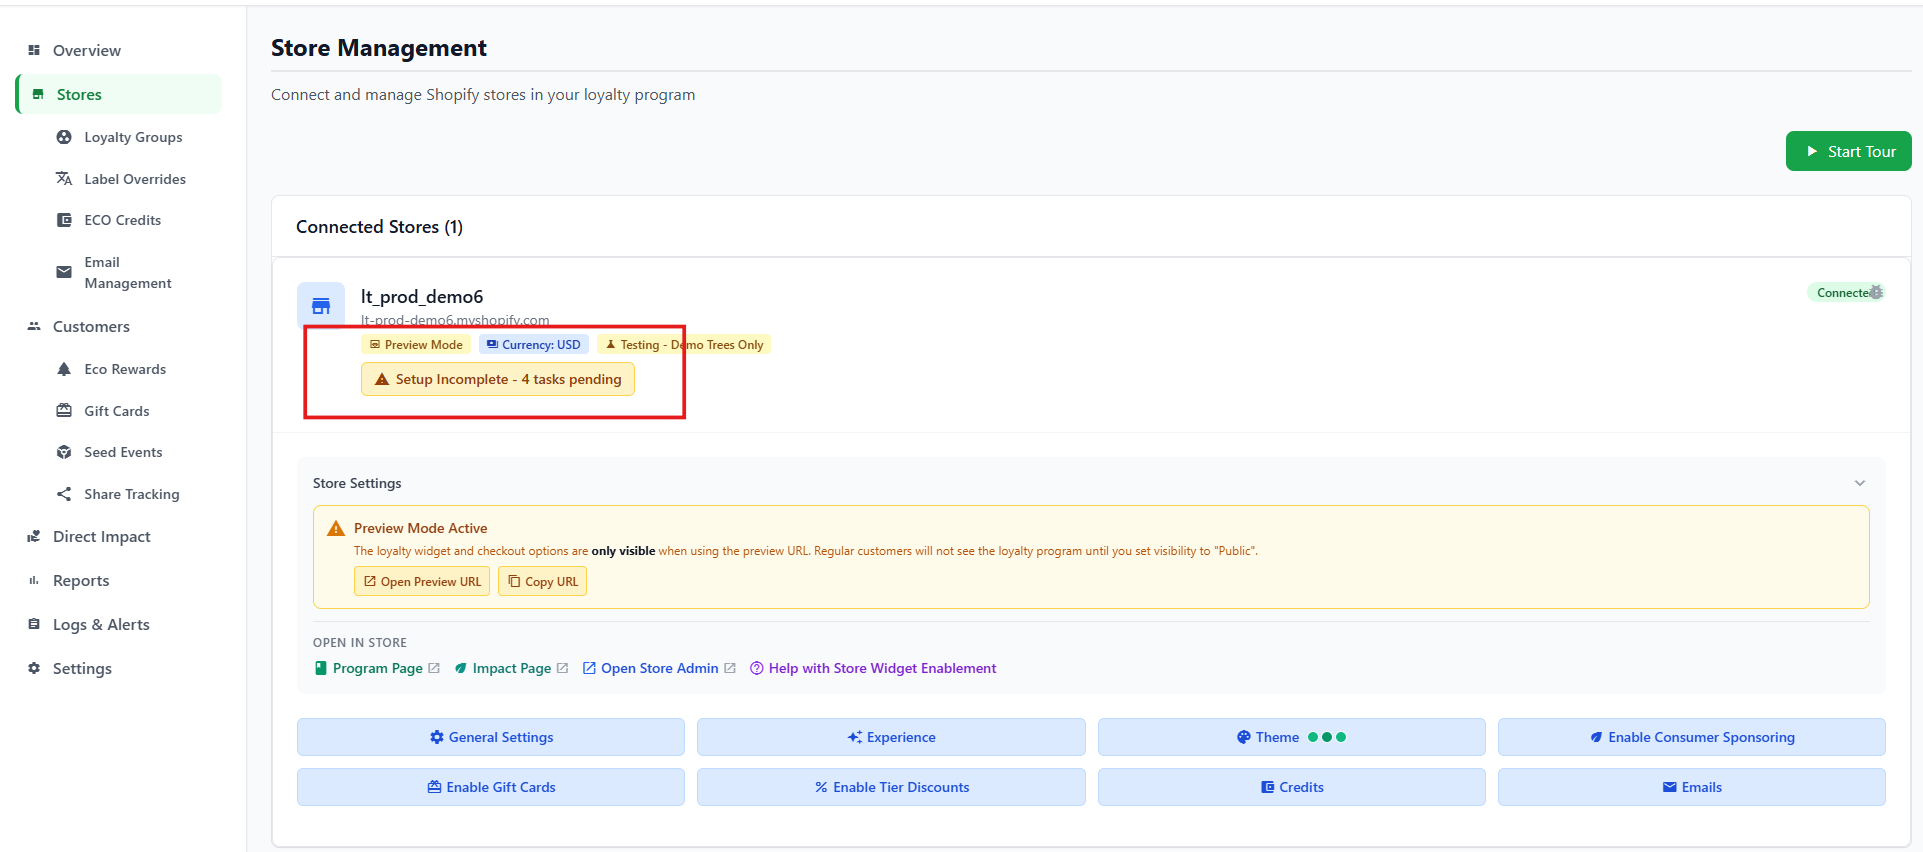
Step 2: Navigage to Stores Tab and begin configuring your Loyalty Store Settings
The quick steps are to click on the Tasks Pending and go through the steps.
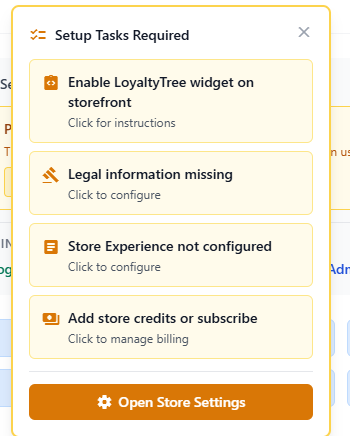
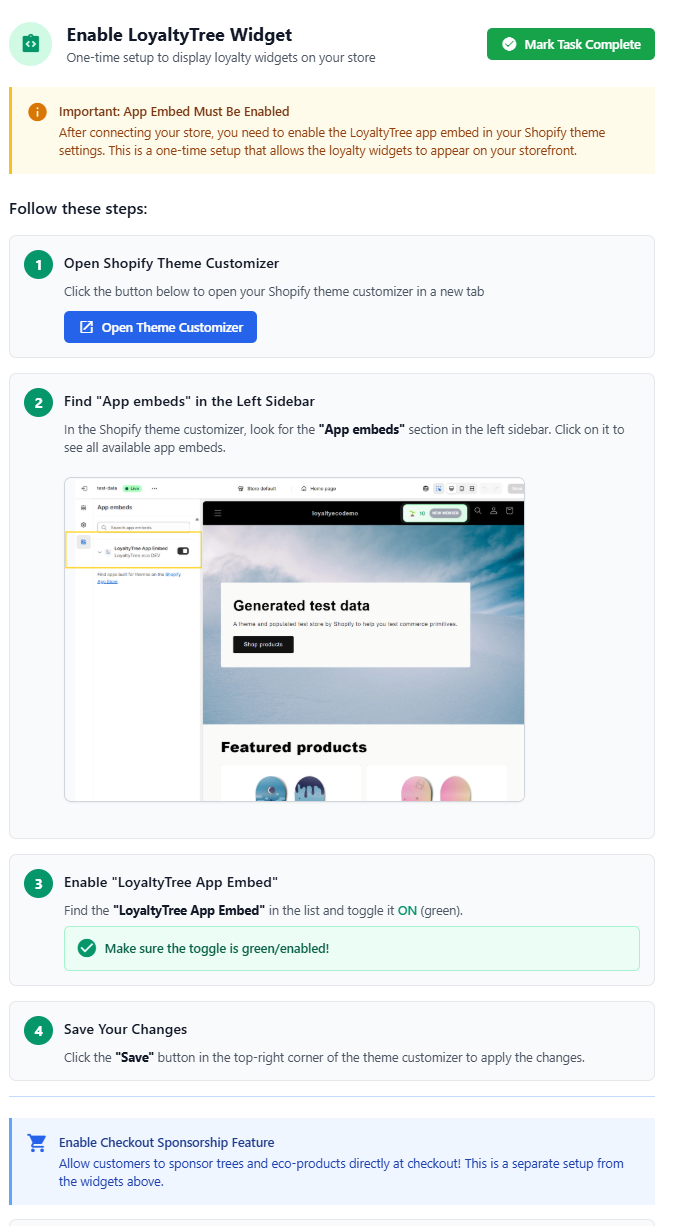
Step 3: Task. Activate our widges and extensions in your stores theme.
Click on the task to enable the Store Widgets and follow the instructions on the dialog
Step 4: Legal Store Info and Loyalty Visibility
Open the Stores Settings Dialog by clicking the General Settings Button or Legal info task. Update these settings:
- Accept Terms and Conditions - required before going live
- Live Mode - When ready to go live add credits to the system and check this box (will not work for test stores). Until that time, your customers experience will work the same but with fake data and no credits will be used.
- Visibility - Disabled, Preview or Public - In Preview mode the loyalty launcher and consumer checkouts are hidden unless you access with a special code in the URL. this allows you to perfect your loyalty program on a live store before releasing to the public.
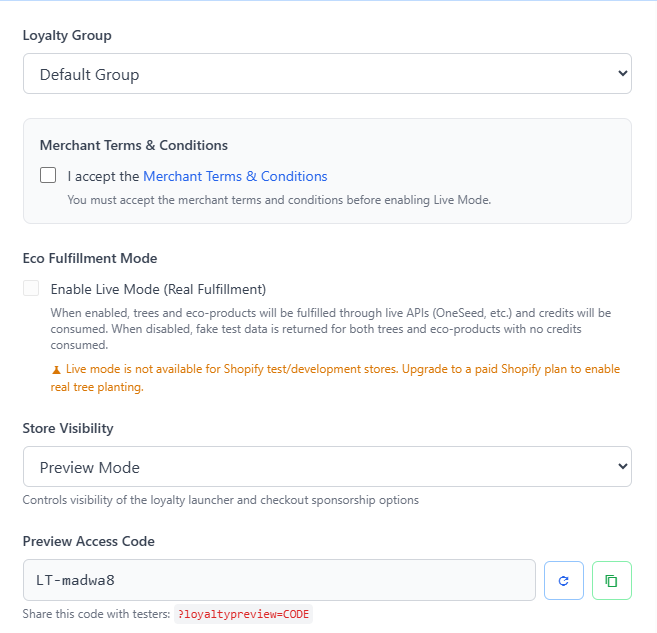
- Legal Information - Fill in your companies and stores legal information. This is using dynamically on the terms & conditions pages and program overview.
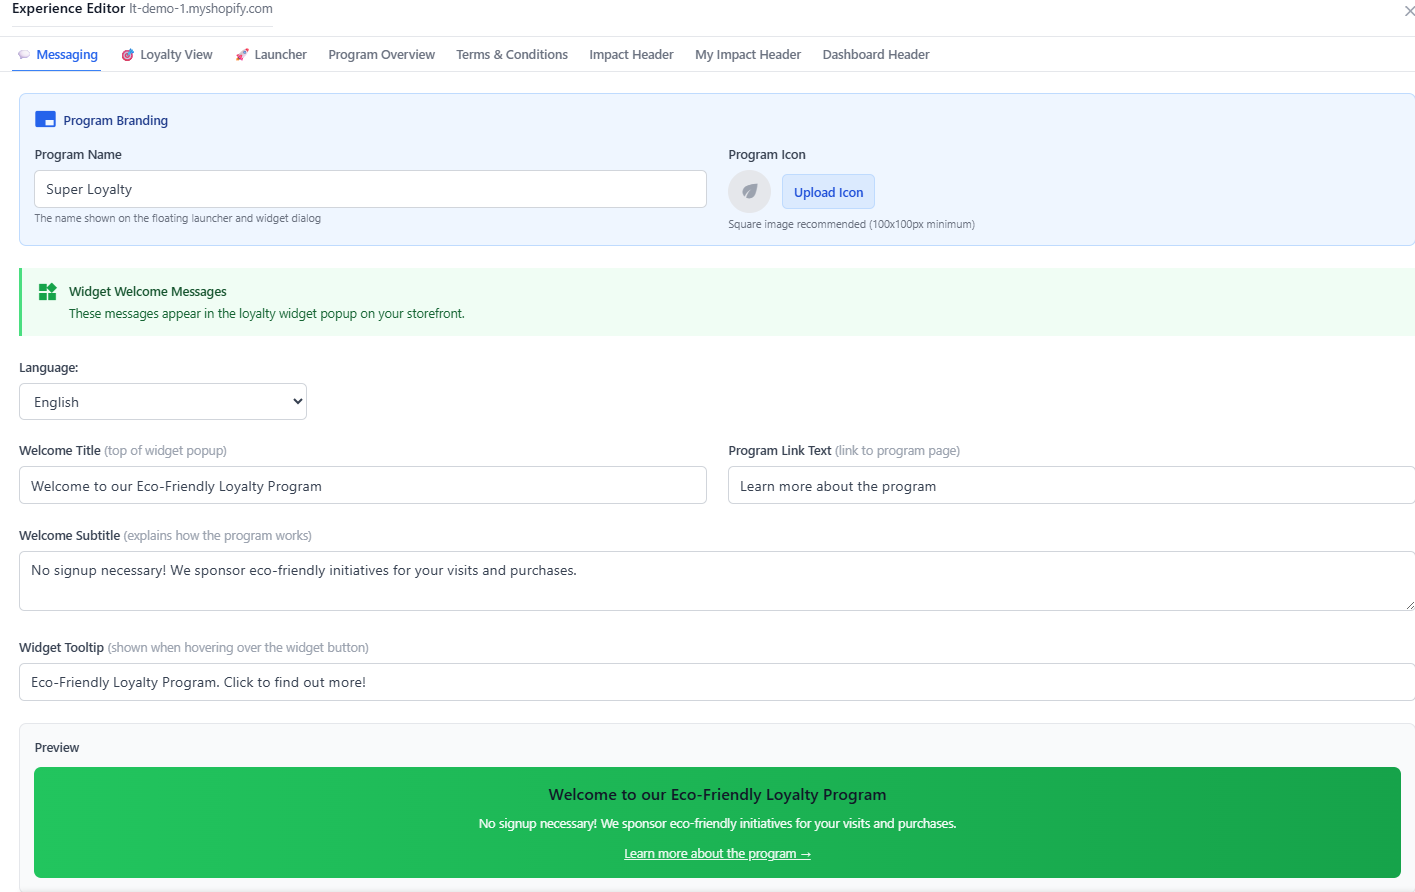
Step 5: Configure your stores experience
Open the Experience Dialog by clicking the Experience Button or the pending task. And go through each tab.

- Messaging - Customize and set how your loyalty program is presented to the customer. Customize for the different languages we support.
- Loyalty View - Choose from multiple formats of how your Eco Tiers and progressions are presented to the customer.
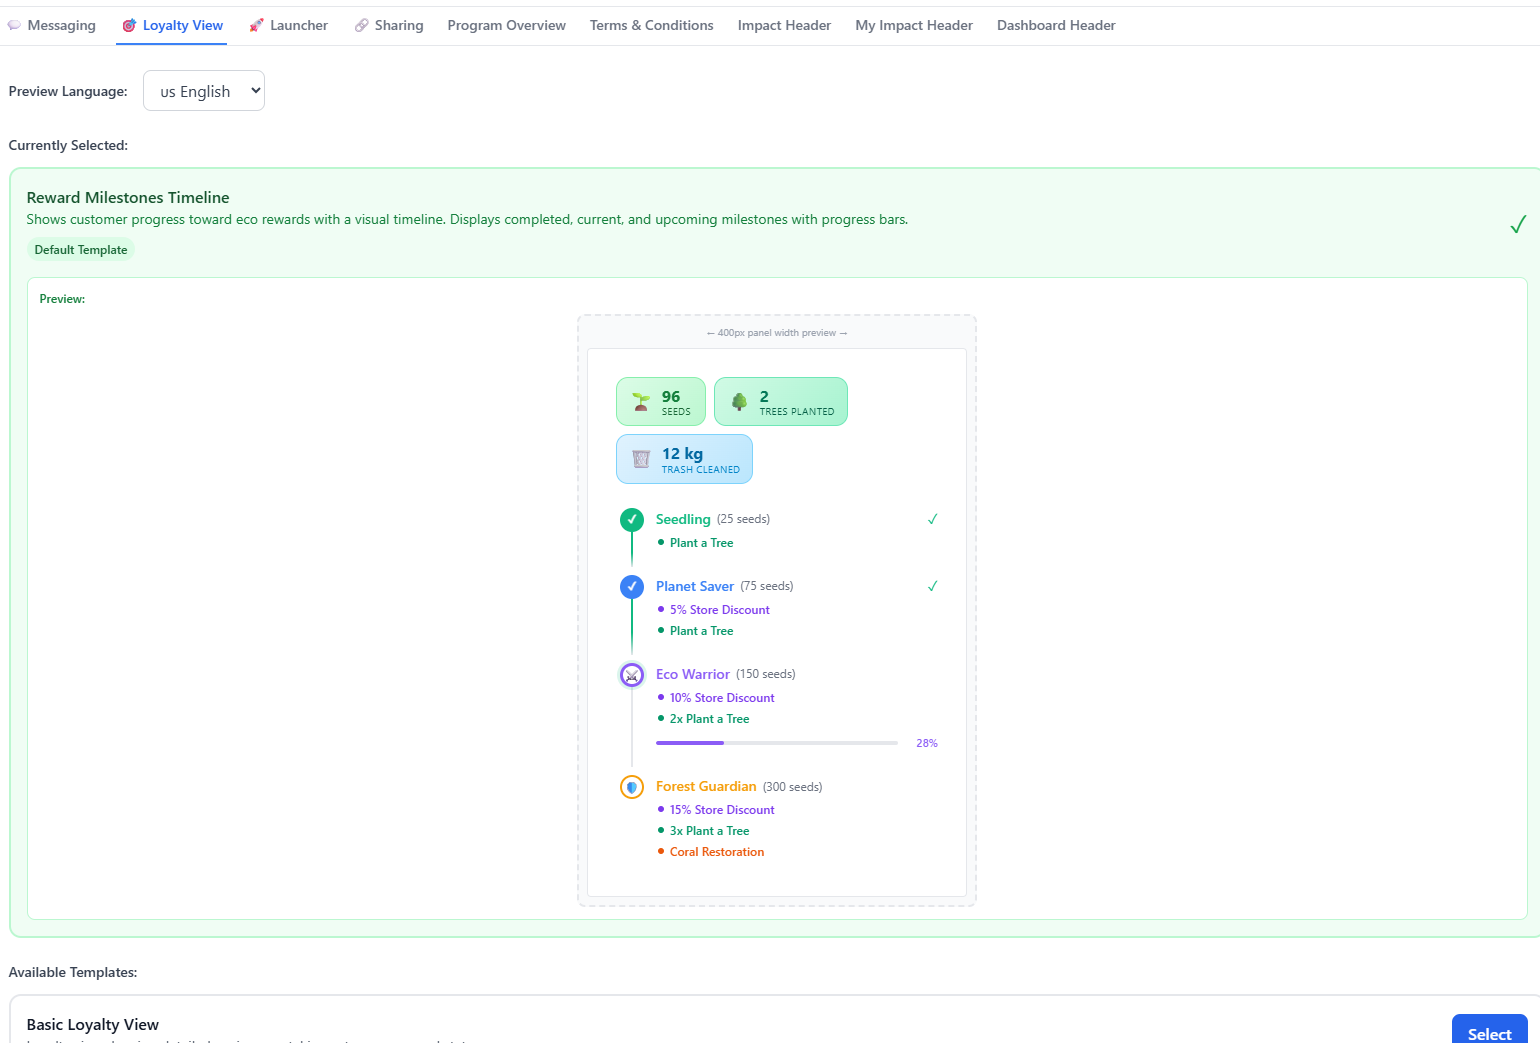
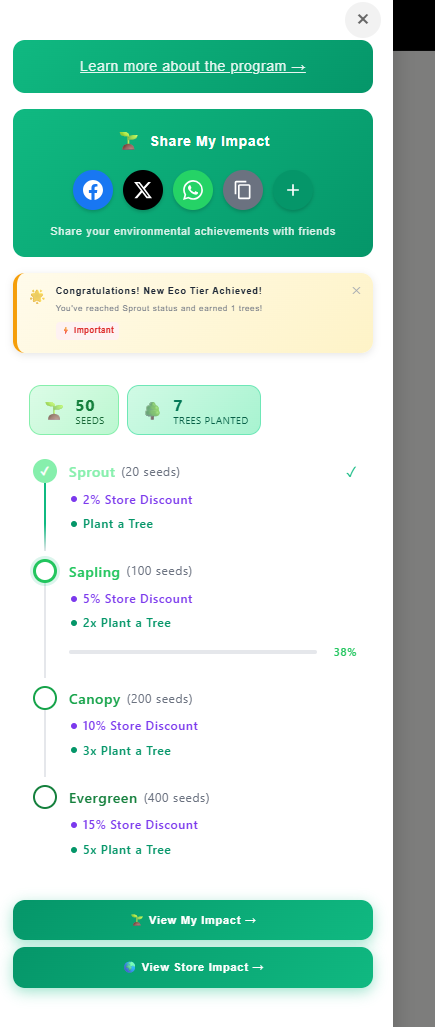
Example Shopify Customer View
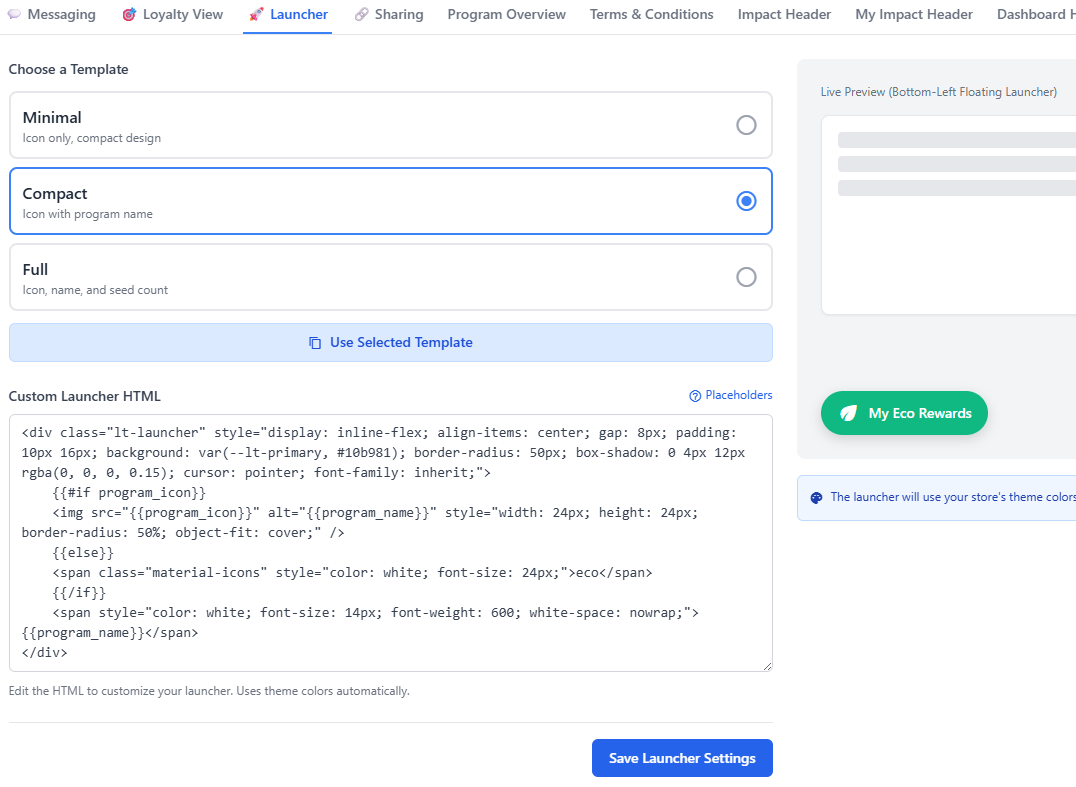
- Launcher - Choose and customize the floating loyalty launcher that the customer sees.
- Sharing - Configure the Social and Direct Sharing Channels for your store

- Program Overview - Set and customize the main landing page for customers to learn about the loyalty program. Defaults are provided and supports multiple languages.
- Terms and Conditions - Set and customize the T&C page for customers to learn about the loyalty program. Defaults are provided and supports multiple languages.
- Impact Header - Customize the header for your stores impact page which dynamically shows all your eco impact
- My Impact Header - Customize the header for your customers shareable public impact page which dynamically shows their eco impact
- Dashboard Header - Customize the header for your customers loyalty dashboard
Step 6: Choose Widgets and Theme Colors
Customize how your loyalty program looks on your storefront. Pick from preset themes or create your own color scheme to match your brand.
Step 7: Configure Seeds and EcoTier Profiles
Set up how customers earn seeds and what eco-rewards they unlock at each tier:
📖 Read full guide: Configuring Seeds and EcoTiers
- Seeds per purchase amount
- Seeds for store visits
- EcoTier rewards (trees, coral reefs, etc.)
Step 8: Set Up Store Credits & Billing
Configure your store credits to fund eco-rewards and customer tree planting. Credits are used to fulfill trees and other environmental rewards.
📖 Read full guide: Store Credits & Billing
- Subscribe to a plan for monthly credits
- Purchase credit packs for immediate use
- Enable auto-topup to never run out
Step 9: Configure Consumer Sponsorship (Optional)
Enable customers to directly sponsor trees and eco-products during checkout. Set pricing and configure which environmental initiatives they can support.
Step 10: Set Up Gift Cards (Optional)
Configure automated gift card rewards for loyal customers. Choose when and how to reward your most engaged shoppers.
📖 Read full guide: Configuring Automated Gift Cards
Step 11: Set Up Automatic Discounts tier benefit (Optional)
Create discounts applied when a registered user reaches an ECO Tier
🎉 You're All Set!
Once you complete these steps, your eco-friendly loyalty program will be live. Your customers can start earning seeds, unlocking rewards, and making a real environmental impact with every purchase.
Need Help?
Visit our Support Center for detailed guides, troubleshooting tips, and FAQs. Our team is here to help you succeed!